Showing posts with label Die Cut. Show all posts

Saturday, July 18, 2026

Unity - Have Faith Birthday

 Happy Saturday!

Today I have a birthday card using Unity - Have Faith Love is All Around.
The image is cut with a Spellbinders square die with a perforated border.
I colored the image with Copic Markers.

Copic Colors: 
Butterfly - YR12, YR14, YR16, YR18
Flower -YG93, YG95, YG97; V06, V09, V12; E23, E25
Background - B000, B01

The image is matted with vellum that I torn the bottom edge.  The base card and embossed panel is PTI Amethyst Allure. 

Thanks for stopping by...
Blessings to you,
Deb

Saturday, July 4, 2026

Unity - Cheesy Birthday


Happy Saturday!

Today, I have another birthday card using a super punny stamp set from Unity Stamps called "Cheese Chat".  I thought this would be a funny card for family and friends who live outside Wisconsin.  

I recently cleaned my craftroom and discovered cardstock on my shelf that I had forgotten was there because there were boxes in front of it.  It was the smooth Bazzill cardstock The Angel Company carried the last year or so, which means it has been on my shelf over 15 years.  Can that be possible?  

I found from yellow Bazzill Grapefruit Bliss and created a stenciled background, which looks like cheese.  The stencil was one I got in a set from Amazon several years ago.  The ink I used was PTI Summer Sunrise.  I've seen card samples with a partially stenciled background that fades out, so I thought I would give it a try.  The sentiment is stamped on Pineapple Bliss Bazzill cardstock and cut with DieNamics Circle STAX Set 1 & 2.  Matted the sentiment and the background with PTI Black cardstock.  

The Cheese and grater image was colored with Copic Markers.
Copic Colors:  Y17, Y21, Y38, E31, E33, E37, W1, W3, W4, R39

I cut the colored image with a edge die from DieNamics - Stitched Basics Edges.  I'm finding all kinds fun of things in my craftroom. 

Thanks for stopping by...
Blessing,
Deb

Saturday, June 6, 2026

Unity - Love Story Anniversary

 Happy Saturday!

Today I have an anniversary card to share and a craftroom organization idea.  First the card, I used Unity - Love Story background and several dies. The happy die cut is from Hero Arts Happy Stamp and cut set.  The hearts and corner accents are from a Die-namics die set Blueprint 32.

Cardstock - PaperTrey Ink White, Pure Poppy and True Black

I stamped the background script on a white panel, then cut the heart out.  The front panel is popped with a piece of red cardstock behind the cut out.  Added the Happy die cut and a fish tail flag with anniversary stamped on it (part of the Hero Arts die and stamp set).  Finished the card off with some corner details and red hearts from Blueprint 32.

I've found so many great dies I had stashed away.  In January, I attempted to better organize my craftroom. One awesome idea I saw last year was from an online card making summit.  They had stampers from all over present card techniques.  Many of them did their card presentation from their craftroom.  I love seeing other people's craft area! I saw this idea in the background and thankfully others in the online class asked about her boards in the background.  She purchased DIY magnetic car decal material from amazon and framed it, then had her dies hanging on the wall right above her die machine - Ingenious!  Here is what mine looks like...
Having my favorite dies readily available really is nice and makes it so easy to use and "put away".  I find I'm using them much more! Die-namics Blueprint 32 is on the board on the right in the upper right hand corner.  My boards are hung with Velcro command strips, so I can take the whole board off if the murphy bed needs to be used.  I purchased a 2 pack of 18x24 magnetic sheet and 18x24" poster frames, which worked perfectly.  The magnetic sheet came rolled up so I let them lay on the floor for a week or so to flatten out while I looked for frames.  I had thought of fitting the sheets in the details of the door but decided not to.  I also cleared off permanent spaces from my die cutting machine and my sewing machine.  Fingers crossed they stay clear, so I can continue to use them easily! 
      
Thanks for stopping by...
Blessings,
Deb

Saturday, May 23, 2026

Unity - Peony Ledger Birthday

 Happy Saturday!

Today I have a birthday card using a stamp set from Unity called Peony Ledger.  The image is colored with Copic Markers.  The papers are from The Paper Studio - The Basics.  I chose 3 papers from the pad and made a patchwork.  

I have not done sewing on my cards in quite awhile. My sewing machine wasn't working quite right and I hadn't taken the time to troubleshoot the problem, but with some help from YouTube I got it threaded and tensioned correctly.

Added the sewed patchwork to a white base card and the stitched banner with the Happy Birthday sentiment.

Copic Colors: RV10, RV11, RV13, RV14; 
YG91, YG93, YG95, YG97; YR12, YR14; B000

Thanks for stopping by...
Blessings,
Deb

Saturday, April 4, 2026

Unity - Reel Great Guy

Happy Saturday!

Today, I have a birthday card to share.  The image is Unity - "Reel Great Guy", which is a great set for masculine cards.  I used Unity Postage Nested die to cut the cream linen texture cardstock, then stamped the image of the fishing lures.  The lures were colored with Copic markers.

Copic Colors: E30, E34, E35, R05, R08, BG45, 
BG49, Y32, Y35, YG13, YG17

I aged the edges of the colored image with PTI Kraft ink and a blending brush and matted it with PTI True Black cardstock.  The base card is PTI Vintage Cream.  I used some scraps of barnwood papers and vintage newspaper papers to cover the base card, then added the image and some twine.

Thanks for stopping by...
Blessings,
Deb

Saturday, March 21, 2026

Unity - Level Up Birthday

Happy Saturday!

Today I have a birthday card I made for our nephew who turned 40 this week.  I thought this stamp set from Unity - Level Up was perfect.  I remember getting him Gameboy games for his birthday 25-30 years ago, so this image had all the nostalgia along with a fun gaming sentiment. 

I stamped the Loading image on white cardstock then used DieNamics - Stitched Basics Edges die to create the angle cut.  Used a stitch banner die for the sentiment.  I added a stenciled chevron in Soft Stone ink to the white cardstock.  The Gameboy image was colored with Copic Markers and fussy cut out and adhered to the front panel with pop dots.  The base card is white.  I added a piece of blue Bazzill cardstock, then added the white front panel with the image and sentiment.

The second card uses the same layout and the gaming controller from the same stamp set. I fussy cut the controller out, so the plug was free and wrapped around the sentiment.  A fun detail I saw on a Unity card sample for this set.

Copic Colors:  B14, B16, Y32, Y35, R14, R46, W1, W2, W3, 0
Cardstock: Bazzill Loganberry Pie, PTI White
Ink: PTI Soft Stone

Thanks for stopping by...
Blessings,
Deb

Saturday, March 14, 2026

Unity - Bot you a Present - Birthday

 Happy Saturday!

Today I have a couple more cards I made with Unity - Bot you a Present.  Similar layout to the Valentine's day card from last month, I changed the die cut to a scallop and base card to PTI Aqua Mist.  The patterned papers are Unity - Love Notes.  I added a sentiment from the stamp set to make it a birthday card.

A third card using patterned paper scraps.
The image is colored with Copic Markers.
Copic Colors: BG11, W0, W1, W2, W3, W7, 
R00, R32, R35, R37, YG05, YG06

Thanks for stopping by...
Blessings,
Deb


Saturday, February 28, 2026

Electrical Birthday

 Happy Saturday!

Today I have a birthday card I made for my friend's husband who is an Electrical Engineer.  I could not resist when I saw this circuit board 3D embossing folder by Tim Holtz.  I had to get it.  I embossed a piece of PaperTrey Ink Blueberry Sky cardstock then used a dark gray Copic marker (W7) to color the surface mounted elements.  With a Artistro gold paint pen I colored the electrical traces and vias. 

I matted the circuit board with gold cardstock and added a die cut happy birthday sentiment from Memory Box. 

A pretty quick birthday card.

Thanks for stopping by...
Blessings,
Deb

Saturday, February 14, 2026

Unity - Robot Valentine's Day

Happy Valentine's Day!

Today I have the card I made for Mark.  It uses a stamps and papers from Unity, called "Bot you a present" and "Love Notes".

I stamped the robot image on white cardstock with Memento ink and colored it with Copic markers.  Then cut it out the shape using Unity Postage nesting dies.

The base card is PTI Pure Poppy.  

Copic Colors: BG11, YG05, YG06, R00, R02, R32, R35, R37, R39
W2, W3, W4, W7, 0

Thanks for stopping by...
Blessings,
Deb

Saturday, January 24, 2026

BetterPress - To my Favorite Person

Happy Saturday!

It's my first post of 2026!  I have the birthday card I made for our niece to share today.  She turned 29 a couple weeks ago.  I'm not sure where the time has gone.  Seems like yesterday we picked her up at daycare, which is a sweet memory. She was playing in the sandbox and looked up to see us, then ran to us with the biggest smile.

I used the BetterPress plate that came with the Spellbinders BetterPress system.  It did not have a name on it, but the sentiment is 'to my favorite person".  
I used a Unity scalloped nested die to cut some PaperTrey Ink white cardstock and taped it to the clear plate.  Then positioned the BetterPress image plate on the magnetic mat, applied Memento ink and ran the BetterPress through my Spellbinders Platinum Machine.  The sentiment is from PaperTrey Ink retired Fillable Frames #4.  I colored the flowers and leaves with Prismacolor colored pencils. 

I experimented with the special inks and paper the system came with; they are nice.  However, I think the even pressure you get putting the BetterPress through the Spellbinders machine is really the key to the crisp image and the beauty of this system. 

A pretty card, with some patterned paper, an ribbed embossed panel and white organza ribbon from my stash.  I'm trying really hard to use all the pretty things I've accumulated over my many years of cardmaking.

Thanks for stopping by...
Blessings,
Deb

Sunday, December 21, 2025

Unity Simple Little Wishes

 Happy Saturday!

Today is day 6 of my 2025 Christmas creations.

The postage stamp die cut is from Unity.  I cut PTI White cardstock with the die.  The stamp set is from Unity Stamps - Simple Little Wishes, which I stamped with Black Memento ink on the die cut and colored with Copic markers.  I gave it a vintage look using PTI Kraft ink and a blending brush, inking the edges.  I added a bit of Copic white paint to the red bulb on the tree.  I love this nostalgic image.

The patterned papers were from a Michaels 12x12 Christmas paper pad from 10-15 years ago.  One thing I have been trying to do the last couple years is to use what I have for Christmas cards.  This means creating more designs; last year I believe I had 7 designs, this year 9 card designs!

I ran the Kraft ink pad over the edges of the patterned papers and the PTI White base card too.  I added a few gems from Amazon to finish it off. 

The second version has the reversed patterned papers.

I'm not sure which version I like better.
I know the plaid was easier to line up the image.

Thanks for stopping by...
Blessings,
Deb
 

Saturday, December 20, 2025

Peace on Earth

Happy Saturday!

Today is day 5 of my 2025 Christmas card creations.  This is another simple white, blue and gold card.  

I found this star die cut set on Amazon.  There were several dies in the set to create a layered star.  I cut 2 in gold and 2 in white and glued them together. 

The Peace on Earth sentiment is an old stamp from The Angel Company, which I stamped in PTI Enchanted Evening ink on PTI White cardstock.

I created an Enchanted Evening panel and matted in Gold.  Then I added the sentiment and adhered the star with pop dots.

Thanks for stopping by,
I have a nostalgic card tomorrow...
Blessing to you,
Deb


Saturday, December 13, 2025

Christmas Joy with Sprigs

 Happy Saturday!

Today is Day 3 of my 2025 Christmas card creations.  Last Saturday I had a card that used the In Love Arts Joy Nativity die and todays card uses it too.  The multilayered stenciled springs of holly background is what I'm going to talk about today.  This stencil set was a Spellbinders Stencil of the Month "Sprigs and Bow" in July 2024.  

Spellbinders usually makes their monthly subscription items available to everyone after a few months.  This set, unfortunately was on clearance in June when I bought it, so it isn't available anymore.  It came with 5 layering stencils and 1 mask for the bow.  I used the 3 stencils to create the sprigs and holly for this card.  

I started with a 4.25 x 5.5" white cardstock panel.  The 1st stencil makes the lighter green leaves, the ink I used was PTI Prairie Grass.  The 2nd stencil adds the stems, I used a darker green, PTI Ripe Avocado.  The 3rd stencil adds the holly berries, I used PTI Pure Poppy.   The ink was applied with a large blending brush.  I only used 2 blending brushes, one for the greens and another for the red ink.

The base cardstock is PTI Ripe Avocado.  I cut the stenciled panel down to 4" wide and adhered it to the base card on the right side.  I added the Joy Nativity panel just like last weeks card, with pop dots.  Then added a few red gems to finish the card.  

Thanks for stopping by...
Tomorrow, I show a card made with the springs and bow.
Blessings,
Deb

Sunday, December 7, 2025

Oh Christmas Tree

Happy Sunday!

Today is day 2 of my 2025 Christmas card creations.  I have a simple card with a line of Christmas trees die cut I found on Amazon.  I die cut some gold cardstock I found on Amazon in 2023. The theme this year is using cardstock I had on hand!

Originally, I was going to cut the trees again in green cardstock, cut the individual trees apart and glue them over the gold so just the star was gold. The die is really detailed with debossed and cut features, which I likes in metallic gold.  I decided to keep it simple sticking to just 3 colors for this card, white, blue and gold.  

The "Oh Christmas Tree" stamp is an old one from The Angel Company, stamped in PTI Enchanted Evening ink on PTI white cardstock.  I glued the gold trees to 3-9/16 x 5-13/16" PTI Enchanted Evening cardstock panel, matted with gold and added the gold matted sentiment panel.  Pretty quick card.

Next weekend, I will share a couple cards that used multi-layered stencils.
Thanks for stopping by...
Blessings,
Deb
 

Saturday, August 23, 2025

Spellbinders - Cosmos Birthday

Happy Saturday!

Today, I have some birthday cards I made using Spellbinders Cosmos Backdrop and stencil bundle.  I found it on Amazon.  This background is so pretty and with the 4 layer coordinating stencils is so easy to color.  I made several color combinations and also played with the layout and the sentiment. The sentiment is from PTI stamp set Cut Away Tags - Summer.

The background is a BetterPress plate, which I inked with Memento Black ink and ran through my Spellbinder die cut machine to make the impression on PTI White cardstock.  I love the BetterPress plates for large backgrounds, gives a beautiful impression like it is printed.  Then, I colored the image using coordinating stencils.  

The inks used are all PaperTrey Ink - Flowers: Pale Peony and Berry Sorbet; Flower Center: Summer Sunset and Honey Nut; Leaves: Green Parakeet and Simply Chartreuse

The first card above is a pink-peach version.  The base card is Pale Peony with a True Black matted image in the upper right corner and matted sentiment in the center.

Card 2 - Teals
The inks used are all PaperTrey Ink - Flowers: Aqua Mist and Hawaiian Shores; Flower Center: Summer Sunset and Honey Nut; Leaves: Green Parakeet and Simply Chartreuse

The second card above is a teal version.  The base card is Aqua Mist with a True Black matted image centered and matted sentiment across center of the background.

Card 3: Purples
The inks used are all PaperTrey Ink - Flowers: Lilac Grace and Amethyst Allure; Flower Center: Summer Sunset and Honey Nut; Leaves: Green Parakeet and Simply Chartreuse

The third card above is a purple version.  The base card is Lilac Grace with a True Black matted image centered and matted sentiment at an angle across the background.

Card 4: Bright Pinks
The inks used are all PaperTrey Ink - Flowers: Lovely Lady and Raspberry Fizz; Flower Center: Summer Sunset and Honey Nut; Leaves: Green Parakeet and Simply Chartreuse

The fourth card above is a bright pink version.  The base card is Raspberry Fizz with a True Black matted image centered and matted sentiment flag added to the background.

Thanks for stopping by...
Blessings to you,
Deb

Saturday, June 14, 2025

Simon Says Stamp - Heart Breeze Engagement

Happy Saturday!

Today, I have an engagement card using Simon Says Stamp "Heart Breeze" die.  The card is for my cousin's son, so needed a more rustic look.  I used some barnwood patterned paper from Craft Consortium, cut to 3.25 x 4.5".  

I stamped a sentiment from Simon Says Stamp! called "Sentiments for you" that I found in my stash.  Then die cut the heart breeze.  I backed the woodgrain panel with PTI Pure Poppy, then matted with PTI Pure Black.  The base card is PTI white cardstock 4.25 x 5.5", A2 size.

Thanks for stopping by...
Blessings to you,
Deb


Saturday, May 10, 2025

Watercolor flowers - Mother's Day

Happy Saturday and Mother's Day!

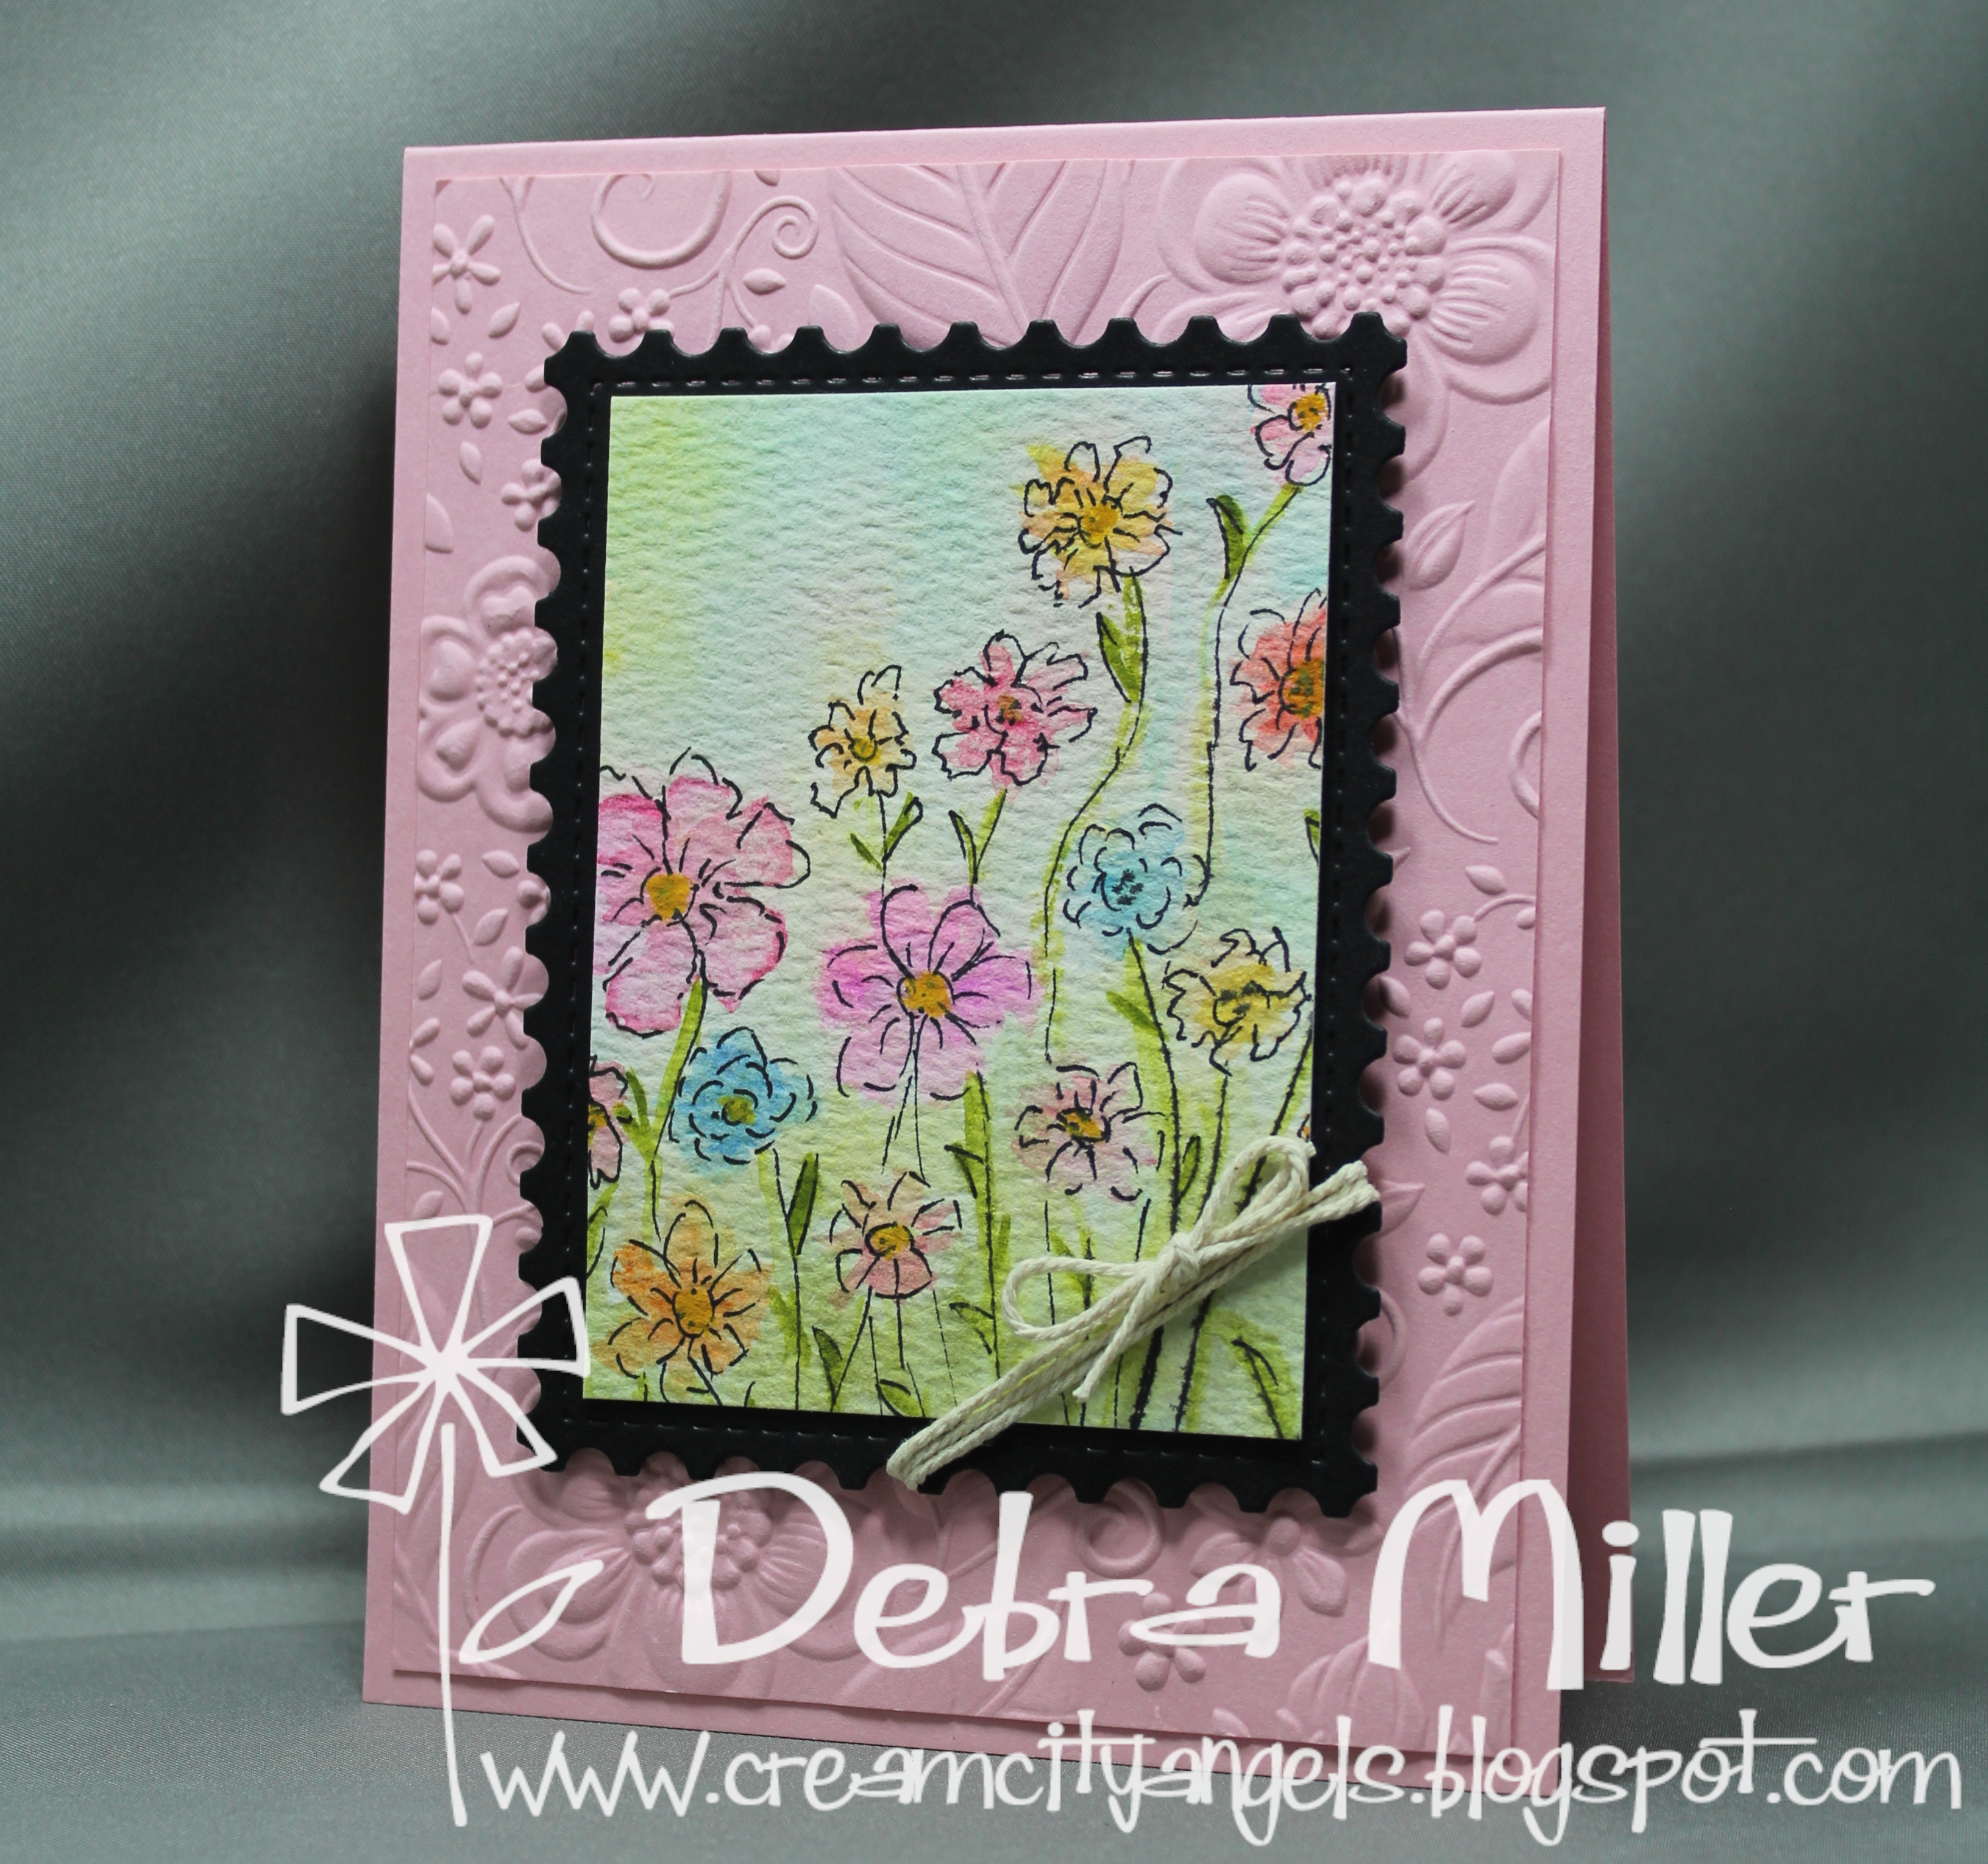
Today I have the Mother's day card I made for my mom.  I got a new watercolor set and was playing around creating free-hand flowers.  

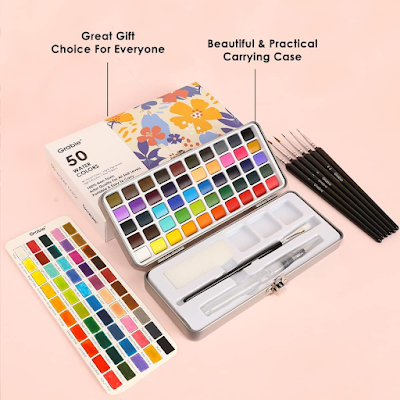
I created several images when experimenting, some I water colored the blooms then added a black pen outline and others I drew some flowers and water colored them.  The watercolor set I found on Amazon, Grabie is the brand.  The paints are in a metal travel carrying case and came with several brushes.  


I used a Unity postage stamp die to mat the water colored image. To add some texture and interest, I used a Spellbinders 3D embossing folder called Efflorescent Flora, which was Jan 2024 Embossing folder of the month.  The base card is PaperTrey Ink Aqua Mist.

Close Up:

I made a few more images with multi-color flowers. Paring them with pink and purple base cards.  They make great any occasion cards.
Base Card PaperTrey Ink Pale Peony

Base Card PaperTrey Ink Amethyst Allure

Base Card PaperTrey Ink Raspberry Fizz

Thanks for stopping by...
Blessings to you,
Deb

Saturday, April 26, 2025

Hot Air Balloon Anniversary

Happy Saturday!

Today, I have the 25th anniversary card I made for Mark.  I found this die set from InLoveArtShop which has the hot air balloon, clouds and dies to create a stunning break in the clouds.  I used PTI white, Pure Poppy, Kraft and Spring Rain cardstock.  

The break in the clouds are 2 dies.  The larger was cut from white cardstock and smaller from metallic silver cardstock.  I used silver from our 25th anniversary.  The white and silver layers were adhered together and attached to the blue base card with pop dots. 

To create the 3D balloon I cut the base balloon out of Kraft cardstock.  Then cut the top of the balloon out of Pure Poppy cardstock 4 times and folded and glued them together to create a fan that folds down to put in an envelope. The balloon was attached to the blue base card. 

I added a few small clouds to the different layers and a Happy Anniversary sentiment. The sentiment is from PTI Cut away tags Summer, stamped on Kraft cardstock that I cut as a fish tail flag.

Thanks for stopping by...
Blessings to you,
Deb

Saturday, March 15, 2025

Watercolor Birthday

 Happy Saturday!

Today I have a birthday card I made for my grand-niece.  I bought a new watercolor set in January and was playing around creating free-hand flowers.  I have a couple monochrome images to share today.  I have several multicolor images to share in an upcoming post. 

The watercolor set I found on Amazon, Grabie is the brand.  The paints are in a metal travel carrying case and came with several brushes.  It also came with a color swatch card which really helps identify the color you are looking for.


The first card is a pink version.  I chose colors that went with PaperTrey Ink Raspberry Fizz cardstock.  I used 140lb cold press watercolor paper.  The blooms and stems were painted freehand, then I added a black marker outline to define the center of the flowers and buds.

Here is a close up...
I used a Unity postage stamp die to mat the water colored image. I used a Spellbinders 3D embossing folder called Efflorescent Flora, which was Jan 2024 Embossing folder of the month, to add some texture and interest.

I made a second card in purples.
The cardstock is PaperTrey Ink Lilac Grace.

Thanks for stopping by...
Blessings to you,
Deb

Saturday, February 15, 2025

Die Cut Valentine

Happy Saturday!

Today, I have the Valentine I made for Mark this year.  It uses a couple die cuts I found online.  The heart background was from InLoveArtShop and the envelope from Amazon.  

The cut out heart background was cut from a front panel is 4 x 5.25" PTI white cardstock.  I used the hearts cut out from the background and colored them to put in the envelope.  I colored them with Copic markers - R35, R46, R83.  

The envelope was cut from PTI Kraft cardstock.  I added the colored hearts to the open envelope and some bakers twine around the outside.  The Happy Valentine's Day sentiment is an Angel Company stamp.  The base card is PTI Pure Poppy.

Thanks for stopping by...
Blessings to you,
Deb