Showing posts with label Tutorial. Show all posts

Saturday, January 10, 2015

Sketch Saturday Challenge #343


Happy Saturday!

We have a new sketch challenge today at Sketch Saturday - #343.  Simon Says Stamp! is back in 2015 to sponsor the 2nd week of each month with a fabulous $25 gift certificate.


Sketch #343...
My Interpretation:
I used the Simon Says Stamp! set 'Sending Happy Thoughts' today and the coordinating papers that came with this great July 2014 card kit. The patterned papers are Pink Paislee 'Pen Pals'.   I stamped the different envelope sizes on different patterned papers and cut them out to make this cluster of love letters.
I created the corner detail using a 3/4" diameter round punch. I lined up the point of the corner with the point of the arrow on the punch cover.  
You can see all the DT inspiration and enter our challenge HERE.  Hope you will join us this week.

Challenges:
Crafty Catz - Polka Dots
Creative Corner Challenges - Love is in the air
Sister Act Card Challenge - Anything Goes

Thanks for stopping by...
Blessings,
Deb 

Saturday, April 27, 2013

Little Miss Muffet & SBS - Tea Party

This is the card I made for the Guess Who game over at Simply B Stamps for the combined SBS and LMM release April 4-6th.  Now that the game is over, I thought I would post my card.
I combined several digis using Photoshop to create this image, both Simply B images and Little Miss Muffet.  Then in Microsoft Word, I cropped and sized the image and added the black border.

Supplies --
Images: Betty In Wonderland, Betty Dorm Mouse and sentiment, LMM Cozy CafĂ© table, LMM Tea Party Dishes and Trays 
Patterned cardstock: My Mind’s Eye “Unforgettable”
Cardstock: PTI Pure Poppy, X-Press It
Dies:  PTI medium scallop, Die-Namics Mix and Match Banner
Crop-A-Dile Corner Chomper
Copic Colors: E00, E11, E13, E21, E30, E31, E33, E35, E37, E47, R02, R24, R29, R32, RV23, BG72, BG75, YR21, YR23, YR24, W0, W1, W2, W3, 0

I also created a video tutorial using this card, showing how to touch up a photo using the free software GIMP.


You can see all the videos I've created - showing how to manipulate digital images, size and print digis, adding a watermark and touching up photos on my YouTube Channel - CreamCityAngels

Challenges:
Stampin for the weekend - die cuts
Copic Marker Europe - Female images
Little Miss Muffet - Food Glorious Food
Paper Crafting Journey - Use a Sentiment

Thanks for stopping by...
Blessings,
Deb

Friday, April 5, 2013

Little Miss Muffet - Tea Party Tutorials

Today, is day 2 of Simply B Stamps (SBS) and Little Miss Muffet Stamps (LMMS) combined "Tea Party Release".  If you missed yesterday's release you will want to check out all new images available at the SBS New Items and LMMS What's New sections of the stores! 
Some of the LMMS design team and several guest designers are sharing tutorials and inspiration posts today.  But before I get to my tutorial -- did mention there are prizes?!?!  Woohoo!  Each day you'll want to check both Simply B Stamps (SBS) and Little Miss Muffet Stamps (LMMS) blog for a list of prizes!

Today, LMMS has two rubber stamps to go to two lucky winners - simply leave a comment at the LMMS blog for your chance to win!  These lucky winners will receive this image below... la Jeune Fille Ă  l'Eventail in a Rubber Stamp! 

As an added bonus with every LMMS purchase, you will receive this exclusive digi stamp for free ... Piccino Mermaid!

Now for my tutorial...
 
I have several "how to's" to share - a coloring technique called spotlighting, a fancy fold {twisted easel} and I also created a few videos if you are interested in learning how to manipulate digital images.   
For the image, I created a party scene using an image of each the LMM artists - Pollycraft (Sonny Hunnycloud For You), Little Miss Muffet (Agent Cupcake), Simply Sophia (Eglantine Faerie) and a new Simply Betty image "Mad Hatter Betty". 

I also used some of the party images from the new LMM Tea Party release.  I printed 2 full images out, plus some cropped images of the same scale. (Video below showing what I printed to create this card)
I colored the image in shades of grey - W1, W2, W3, W4, W5.

I had never colored the rest of the image before.  Traditional spotlighting, that I've done in the past and featured on Splitcoast as a technique is usually an uncolored image with a colored highlight.   

This idea, to color the rest of the image in greys, came from a card made by Faye {LMM's awesome DT coordinator}.  She had a card on her blog in February which I thought was very clever and striking.  You can see her card HERE.  
  I also printed out a cropped image of the Mad Hatter Betty image and punched it out with a 1.5" diameter punch.
 I colored Mad Hatter Betty in full color.
E00, E11, E13, E21, E33, E35, E37, YG03, YG13, YG23, YR02, YR04, YR07, YR12, YR15, YR18, YR31, R01, R22, R24, 0.
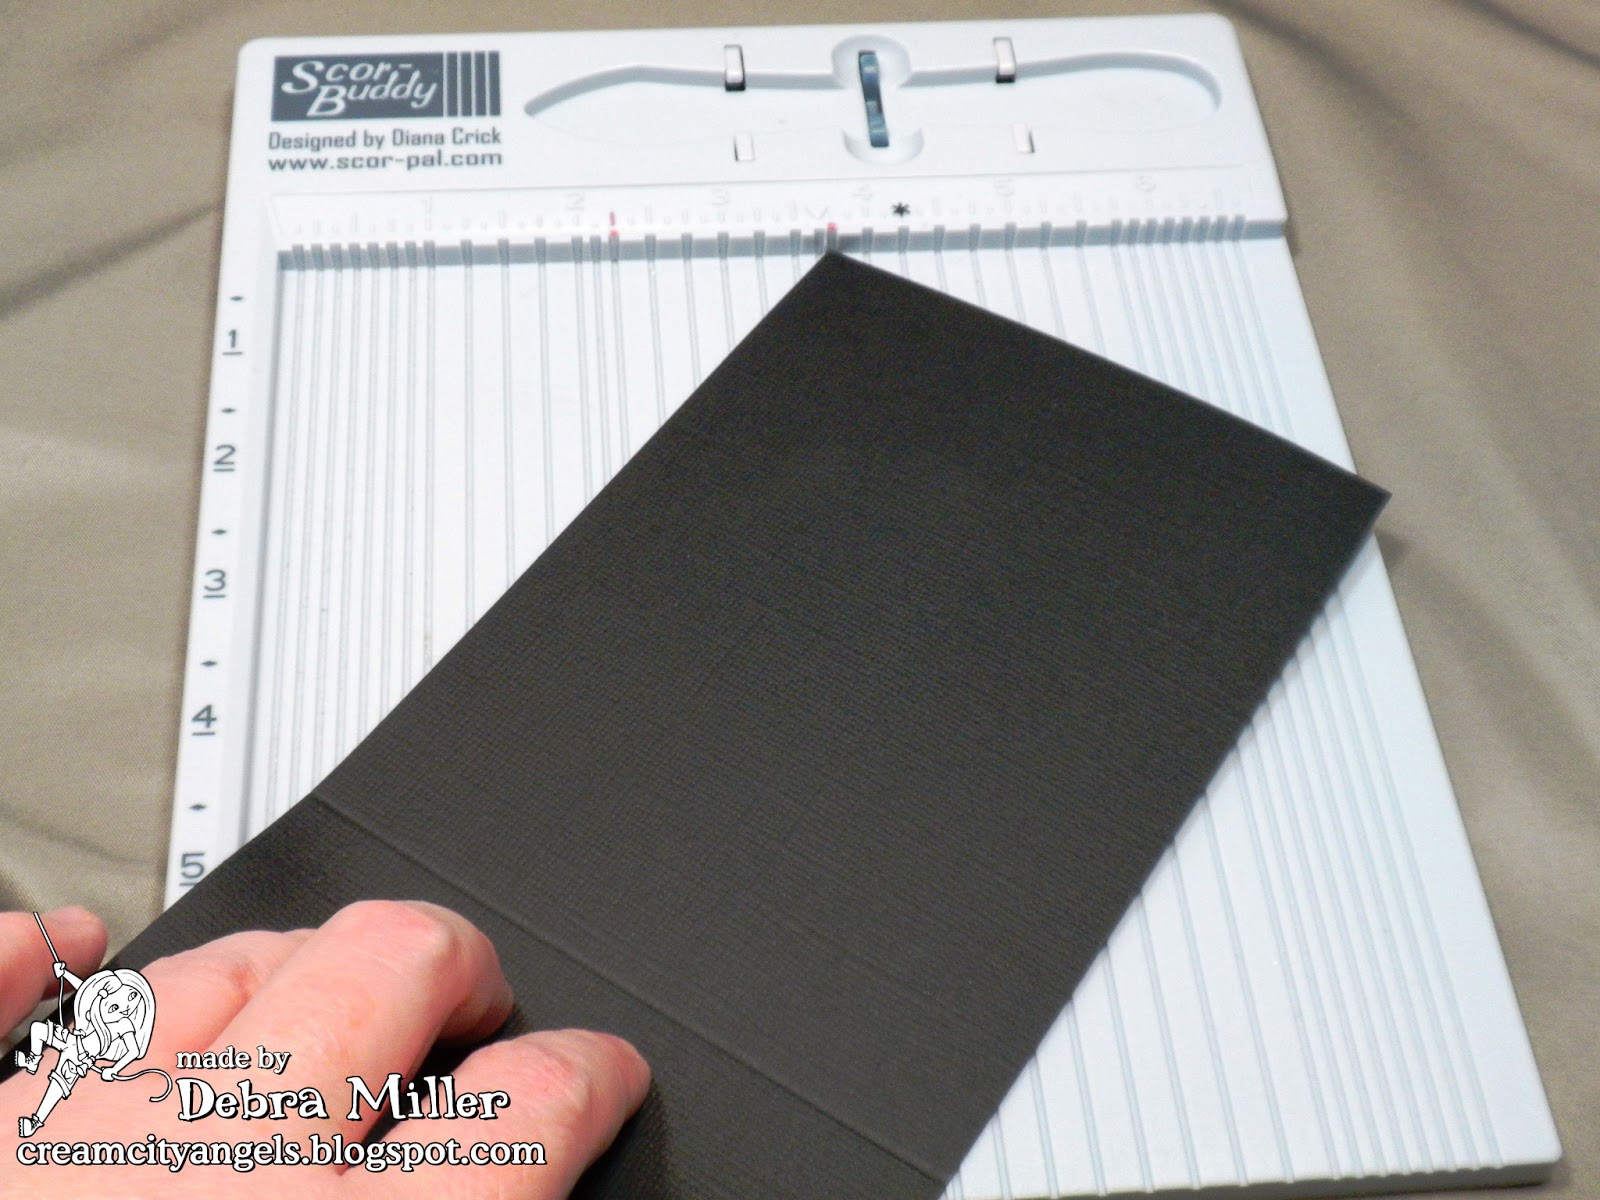
Next, creating the fancy fold base card.  This is a twisted easel fold.  It is very simple.  I cut an 8.5x11" sheet of Bazzill Raven cardstock 4.25" x 11", in half length ways.  I scored it at 5.5". 
 
I lined up the top corner and 
the bottom corner at the score line. 
  I scored the front of the card corner to corner.
This is the base card fold.
I added double stick tape to the bottom half of the card, 
away from the edges.
Then, I placed the finished matted image on the front of the base card.  The paterned paper is Basic Grey Piccadilly.
Inside, I matted a couple more sheets of Piccadilly patterned paper, to tie the spotlight colors in and I added a sentiment which acts as a stop for the card.  Welcome to the party Betty!

Lastly, the video tutorials...

Over the last couple years, I've been asked a lot of questions from my TAC stamp customers who wanted to try digis.  TAC actually had a digi store briefly in 2011. I've only been using digis about two years myself, but have learned a lot from design teams and online.  Until now, I really didn't have an effective way to communicate how to do something using software. 

There are lots of ways to do things, lots of programs you could use, but this is one way to manipulate digital images.  Hope you find the videos useful. 

Here are the videos...


Wondering how I made these videos?  You can too!

The Screencapture software I used is "Screencast-O-Matic".  There is a free version, but I ended up buying a $15/yr subscription to get the audio and caption features of the program.  I really like this software.

The videos were edited using Microsoft Live Movie Maker a Free program.  Very useful, I found this program when my mom asked if I could make a video of the pictures from my nieces wedding.  A very fun program to play with!  This is how I added the opening title page, credits etc... 

I created a Cream City Angels YouTube Channel (button on left sidebar) where you can find all my video creations.  Perhaps there will be more coming :D  I do have a few more ideas.  I'm open to suggestions too. 

Lots going on with this combined release...

Day 1 (April 4th) - Release Blog Hop (click HERE to start)

Day 2 (April 5th) - Inspiration and Tutorials (SBS and LMMS)

Day 3 (April 6th) - Guess Who at SBS and Scavenger Hunt at LMMS 

You have until April 10th to play along and  LMMS Winners will be announced here on April 11th.


Challenges:
Ladybug Crafts - Anything Goes 
Loves Rubberstamps Challenge - Anything Goes
Papertake Weekly - Anything Goes 
Through the Craftroom Door - Anything Goes 
Vickie's Challenges - Anything Goes 
A Little Bit Crafty - Anything Goes
Sparkle N Sprinkle - Use a Digi
The Crafting Cafe - Let's Celebrate
Make it Monday - Anything Goes
Songbird Challenge - Colored Hair 

Thanks for stopping by...
Blessings,
Deb 

Tuesday, June 26, 2012

RRD: Gratitude to God

This week, I have some more ideas to get more out of your punches, another layered flower and a banner.  I used Kaleidoscope Brites cardstock again this week.
I used the 1-1/4 and 1-3/4" Flower Punch
again this week.
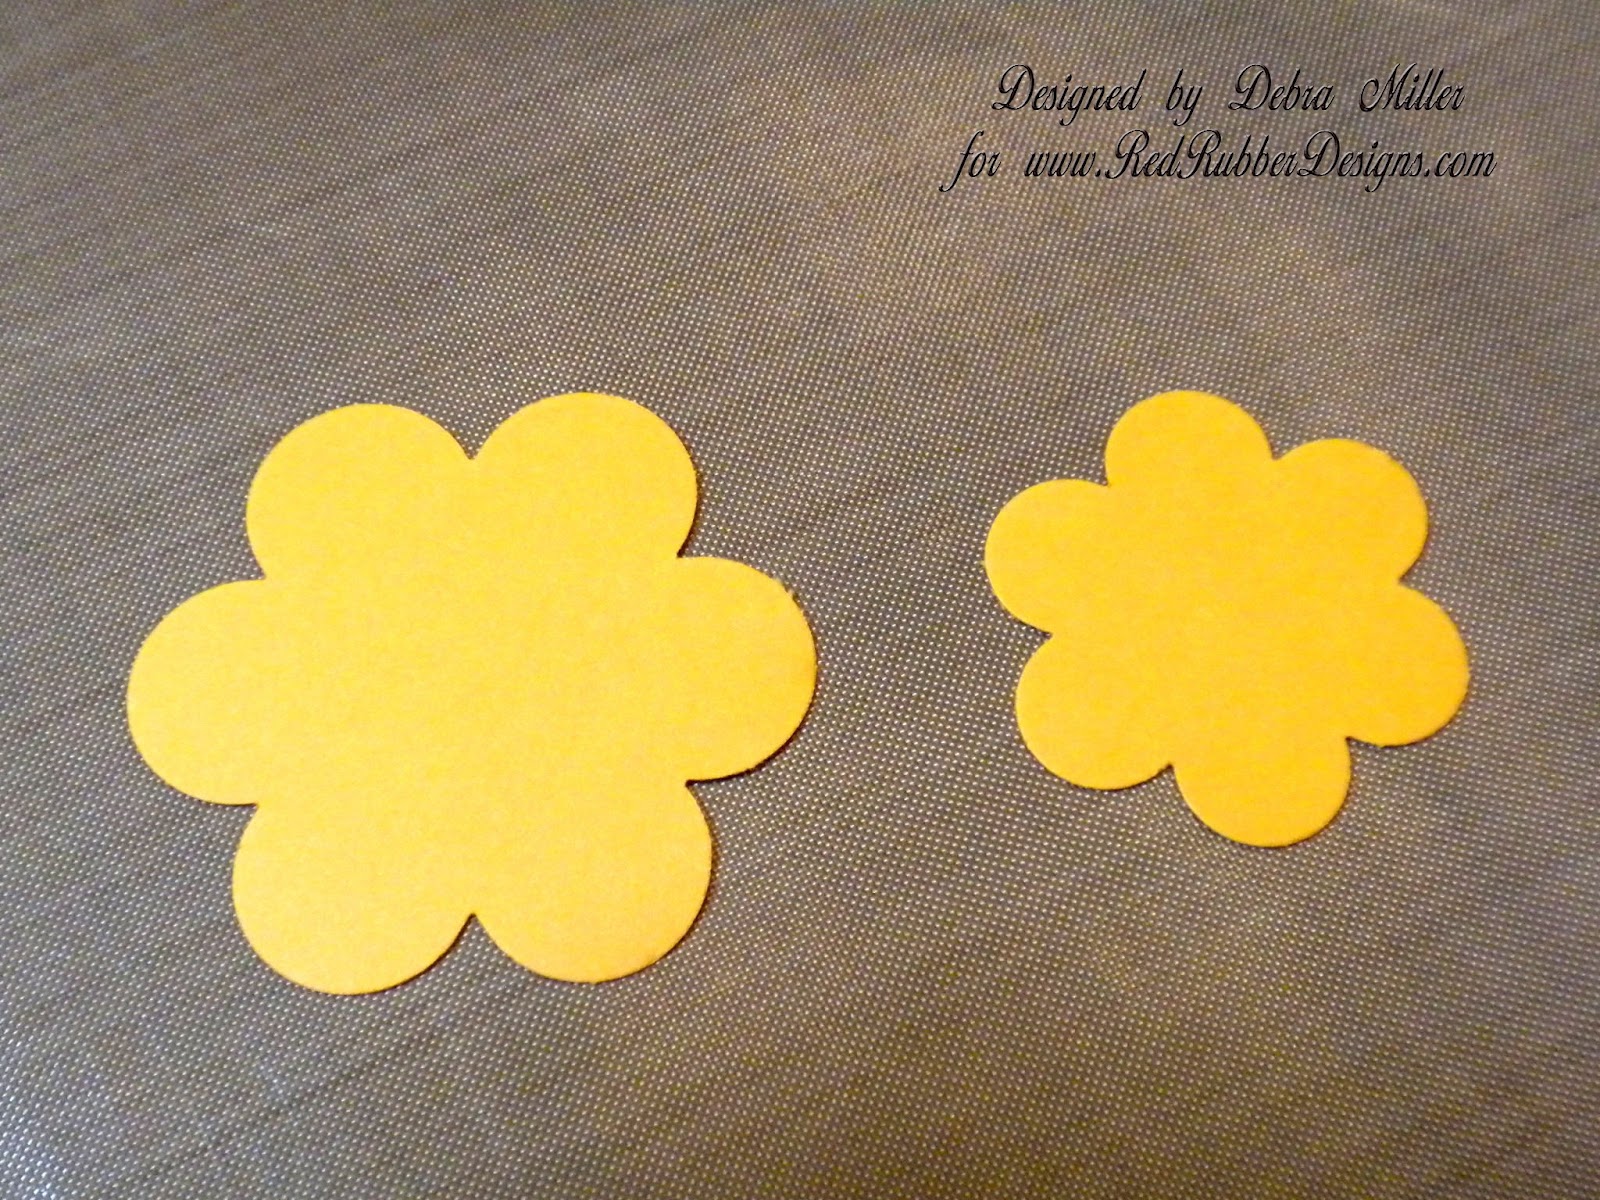
 This time I cut the flowers into 6 petals.
 I gently formed the petals to give them some dimension.
I used a large glue dot and placed the larger petals 
on the glue dot, leaving gaps between the petals.
 Then added the second layer of smaller petals.
Then I added a button to the center of the flower.
To make the banner, I used a 1-3/4 square punch.  
I added a paper ruler to my punch to make sure
it is even and centered when I punch.
When the corners are at equal lengths on the ruler
the cut will be centered and even on either side.
 Here is the punched banner.
I added the sentiment "Gratitude to God" on vellum.  It has been a long time {many years} since I've used vellum.  The vellum RRD carries is absolutely perfect for stamping.  The sentiment came out perfect.  It is crisp and clear and sheerness of the vellum does not weigh down the piece.
 I added some Mia's Cottage ribbon and 
the flower to the banner.
  The finished page.

Supplies --


Scrapbook supplies are on sale all month - 20% off at Red Rubber Designs.

Challenges:
Cupcake Inspiration - Photo Inspiration
Crafting When We Can - Summer Fun
 Psalm 46:10 "Cease striving and know that I am God; I will be exalted among the nations, I will be exalted in the earth."
Quirky Crafts Challenges - Handmade flowers and ribbon
Great Impressions - Dies Cuts or Punches

Thanks for stopping by...
Blessings,
Deb

Tuesday, June 19, 2012

Red Rubber Designs: Be Happiness

Today, I have a some scrapbook embellishments to show using stamps and punches.  I saw this double punch technique with a scalloped punch on Pinterest and decided to try it with some flower punches.  It is a really clever technique to get more shapes out of one punch.  Gotta love that!
 I used the 2 six petal flower punches (1-1/4" and 1-3/4"
 I punched the 2 flowers.
 Then created a handle with some cardstock scraps,
 so I could hold the flower in the punch.
 Then, I rotated the flower so the petal would be divided 
in half and punched a second time.
 Now I have 2 twelve petal flowers.  
I punched a 5/8" hole in the the center of the smaller flower.
Then, layered the smaller flower on the larger with pop dots and added a button in the center.  {I think it looks a lot like a straw flower or daffodil}
Next to create the pocket, I used a coin envelope and cut the top so it was open.  I added some Kaleidoscope Brites cardstock to the pocket. 
 I added a finger grab for the card that slides in the pocket 
 The pull out card is 2-1/8 x 4" and I rounded the corners 
using the Corner Chomper.
I added the flower to the card with a pop dot 
and some Mia's Cottage ribbon to the pocket.
 Using Black Palette ink, I stamped 
a sentiment from "Be Happiness" on the card.
  Here is the finished page.
With the card out of the pocket.

Supplies -- 


Scrapbook supplies are on sale all month - 20% off at Red Rubber Designs.

Challenges:
Crafty Cardmakers - Anything but a card, tag, ATC
Paper Playtime - Anything Goes with sentiment
Stamp and Create - Bright and Bold
Tammy's Scrapin Corner - Ribbon or bow 

Thanks for stopping by today...
Blessings,
Deb